May 23, 2013

Co-Ed Baby Girl Shower

 Last Weekend I Was Part Of An Amazing Group Of Ladies Who Planned A Baby Girl Co-Ed Shower For Our Good Friends Eric & Rachel And It Turned Out Beautiful...Not To Mention It Was A Beautiful Day To Have A Party!


Our Friend Jessika Made These Banners. Simple & Pink!
She Also Has A Wonderfully Creative Blog Called Look What Jeff Did & She Posted Pictures Of The Shower Which Can Be Found Here.


You Can Never Go Wrong With A Bouquet Of Balloons!


Jessika Also Created This Garland Of Onsies & Baby Girl Dresses! So Cute!!


I Put These Centerpieces Together Using Mason Jars, Burlap & Silk Flowers. I Wrapped Pink & White Baker's Twine Around The Top & Tied It Off With Some Cute Pink Pacifiers!

 
Oh, The Necklace Mess....We Played The Game Where You Couldn't Say Certain Words Or Someone Would Take Your Necklace & Whoever Had The Most Necklaces At The End Won....
Well, Here Are Some Of The Girls Working Hard To Untangle The Mess That I Created! I'm Forever In Debt To Them!


The Cupcakes Were Made By Our Friend Kristen's Mom.  She Makes The Best Cupcakes.  We Had Chocolate & Carrot Cake Flavored With Vanilla Butter Cream Frosting (requests from the expecting parents)!!!  They Were Topped With Pink Chocolate Booties & They Were Delicious!!!


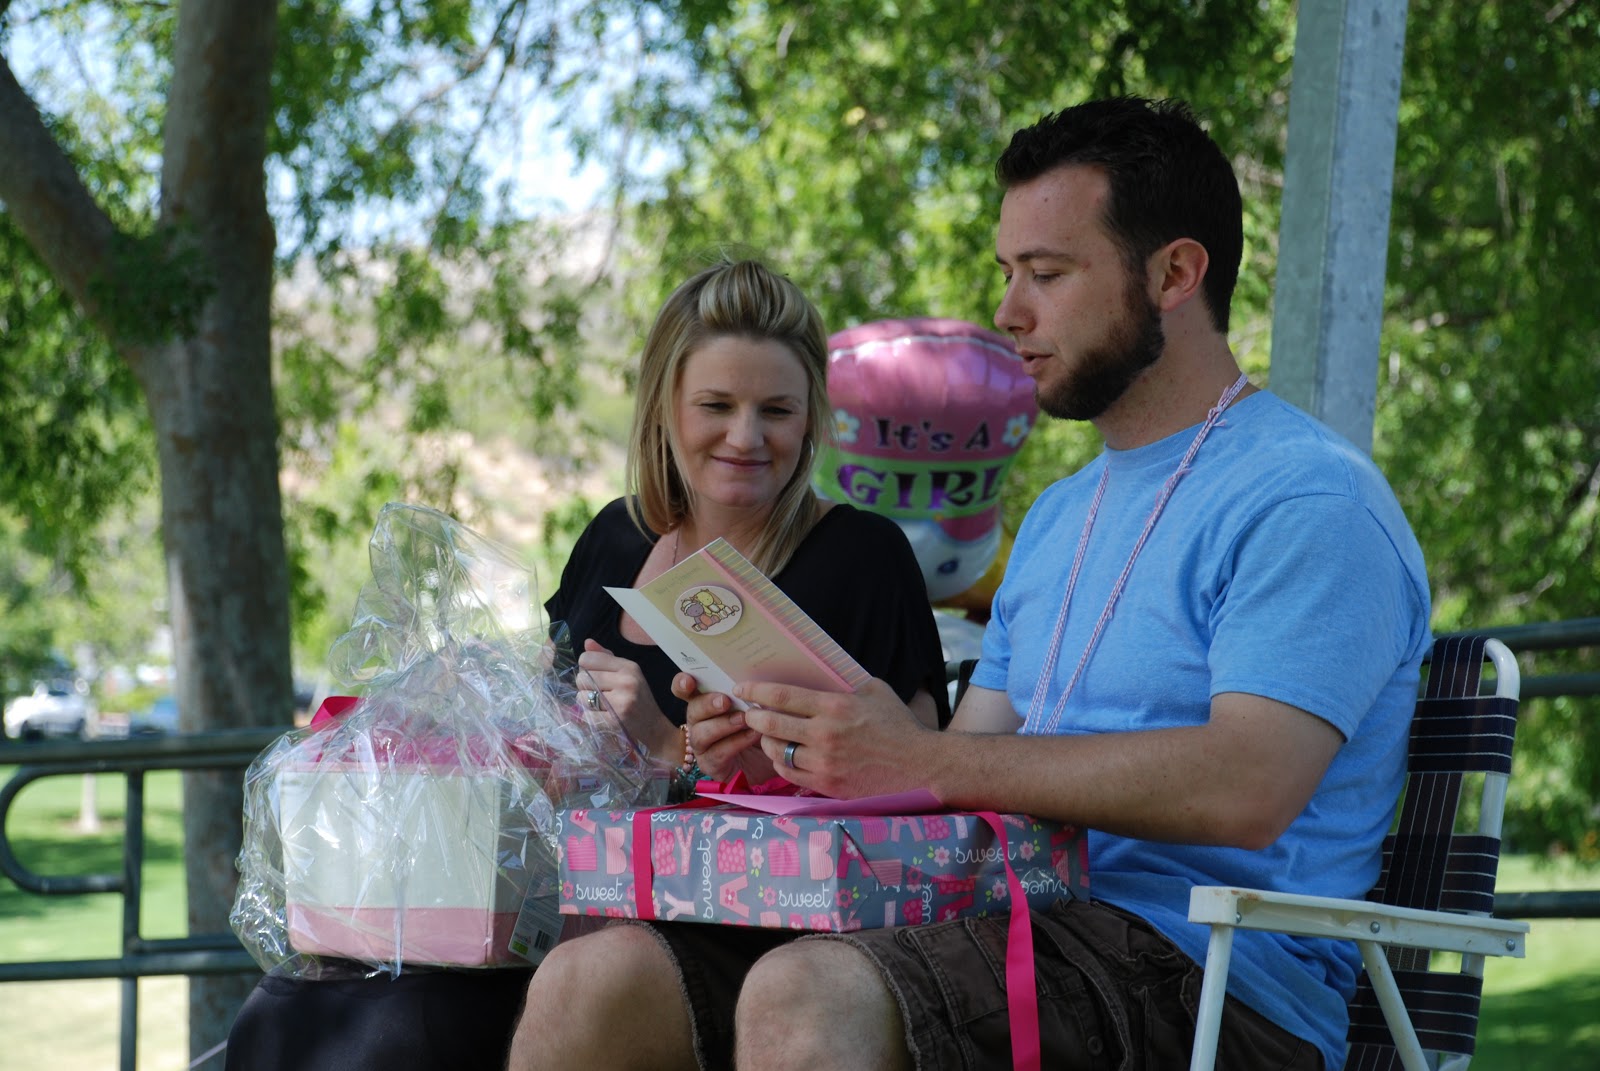
A Baby Shower Wouldn't Be Complete Without Gifts For The Baby (and her parents)!


 The Beauty Of Where The Baby Shower Was Held Was That The Volleyball Court Was Right Next To The Gazebo, So Of Course We Played! 


Here Are The Amazing Parents To Be! They Were So Blessed That Day By All The Wonderful Gifts They Received, Which Goes To Show How Wonderful They Are To Have So Many Who Love Them!


 Also At Their Request, Guests Brought Their Favorite Book & Signed Them, Which Was A Wonderful Way To Not Only Build Their Little Girl's Library, But Also Count As A Guest Book!


It Was Such A Lovely Day & It Couldn't Have Been More Lovely For Eric & Rachel.
Congratulations On Your Baby Girl!!!

May 20, 2013

'Hugs' For A Teacher

Recently, We Had Teacher Appreciation Week At My Daughter's Preschool & After Some Research, I Found This Super Cute Idea & Of Course Put My Own Twist On It...
 
 
The Original Idea Can Be Found Here:http://www.littlepumpkingrace.com.


Here's My Twist!!!
Mason, Ball & Kerr Jars Are In, So I Went With That Instead Of A Basket.
Plus, The Teachers Can Always Reuse The Jars! 


 I Used My Wonderful Cricut For The 'Hugs'.
And Who Can't Go Wrong With A Little Baker's Twine?!


I Changed Up The Verbiage On The Tag Because I Didn't Have A Lot Of Room & I Don't Have The Best Penmanship To Write Small!  But I Think It Gets The Message Across!


You Can Always Tweak This Idea To Make It Your Own, But It's True That Teachers Need Hugs Just A Much As They Give Them!
 

May 11, 2013

Pallet Decor

Everywhere You Look There Are New And Creative Things To Do With Pallets And I Saw One I Would Like To Share With You. I Copied It & Elaborated On It (of course)...
I Saw This Photo When Googling Ideas.  It Came From This Link.


I Had A Ton Of Black & White Photos On My Hallway Wall Of My & My Husband's Grandparents From Years Ago And I Thought It Would Work Wonderfully In The Living Room On This Pallet.
So, Fortunately, I Have A Friend Who Was Able To Get His Hands On A Free Pallet (here in So. Cal they don't come easy) & I Had My Husband Move The Slats Around To Look Like The One Above.

I Didn't Have Enough Space On The Pallet For All The Photos I Had & I Felt I Needed More Than Just The Pallet On That Wall, So I Purchased This Chalkboard Shelf From Target.  Then I Framed The Photos & Began Arranging Them.

I Am Not A Fan Of My Penmanship, So Instead Of Handwriting L-O-V-E On The Shelf I Used My Cricut & Cut Out The Letters.


I Wanted To Add Some Color Somewhere & I Had Seen This Phrase (which is part of a hymn) In Someone's Home & Knew I Wanted To Use It Too!


I Had My Husband Chop Off The End Of The Board I Chose From All The Scraps In Our Garage To Make It Look Like Driftwood.  Then Using A Color I Already Had, I Grabbed A 'Throw-Away' Paint Brush &  Slopped It On...Literally, Slopped It On.  In Order To Make It Look Distressed, I Didn't Prep The Wood Nor Care To Paint On A Nice Coat (which is why I used the 'throw-away' paint brush).


It Turned Out Pretty Good!


Using My Handy Cricut, I Cut Out The Letters To The Phrase of the Hymn, Stuck Them On & Hung It! (well, my husband hung it!!)


Now I Need To Get The Rest Of The Living Room To Match The Blue....


This Was A VERY Easy Creation, Especially If You Have Access To The Materials. The Only Item I Purchased Was The Chalkboard Shelf!!!  YAY!!!

Although I'm Very Happy With This Project, It Leaves My Hallway Wall Needing Some TLC!!!


May 5, 2013

Pinterest Test: BIG PASS!!!!

Okay...This Is By Far THE BEST Dessert I Have Ever Made & The Best Part Is That It Is Really Easy.


I Pinned It A While Ago And Decided To Make It For Our Easter Dessert (yes, I realize it's been a while since I made it)
 
Here Is The Link To My Pinterest Page Where I Pinned It & Here Is The Link To The Recipie On All Recipies.Com. 
 
The Beauty Of This Recipie Is The Only Baking You Do Is To Prepare The Crust & Even Better, You Can Keep It In Your Frezer Until You Are Ready To Serve It....Which Means You Can Make It A Head!
 
You Will Need A Spring Form Pan. If You Don't Have One, Invest!  They Are Not Expensive And They Are Wonderful To Have Around If You Bake.
 
 
I Thought I Would Make This In A Pie Tin, But I Went With What The Recipie Said And I'm Glad I Did Because There Is No Way It Would Have Stayed Formed In A Pie Tin!
 
I Will Make This Again For Sure And I Encourage All Of You Carmel Lovers To Make It As Well...
 
ENJOY!


April 25, 2013

Pinterest Test: Pass!!!! - Mexican Sweet Corn

Hellllooooo! I Know It's Been A While, But I'm Back!  Took Some R&R. My Husband & I Are Expecting Our 2nd Child and This First Trimester Was a Doozie! 

But I'm Back To Creating Again!
 
I Wanted To Share With You A Recipe I Pinned On Pinterest That Turned Out Amazing!!!
 
You All Have Had The Sweet Corn That Chevy's Used To Serve, Well, This Is It:
 
~ Mexican Sweet Corn ~


There Is A Bit Of Process Required In Making It, But Overall, It's Easy & The Payoff Is Delicious!

Here Is The Link I Pinned This Recipe From: Chef In Training. She Took The Recipe From AllRecipes.com!

The Ingredients Are:

1/2 cup butter, softened
1/3 cup masa harina (found near the cornmeal)
1/4 cup water
1-1/2 cups frozen whole-kernel corn, thawed
1/4 cup cornmeal
1/3 cup white sugar
2 tablespoons heavy whipping cream
1/4 teaspoon salt
1/2 teaspoon baking powder

Instructions Are As Follows:
(I Added Pictures So You Have An Idea Of The Constancy For Each Step)

1. In a medium bowl beat butter until it is creamy. If you have a KitchenAid mixer, use it!

2. Add the Mexican corn flour (masa harina) and water and beat until well mixed.

3. Using a food processor, process thawed corn, but leave chunky. Stir into the butter mixture.


4. In a separate bowl, mix cornmeal, sugar, cream, salt, and baking powder. Add to corn flour mixture and stir to combine.


5. Pour batter into an ungreased 8×8 inch baking pan. Smooth batter and cover with aluminum foil. Place pan into a 9×13 inch baking dish that is filled a third of the way with water.


6. Bake in a preheated 350 degree F oven for 50 to 60 minutes.
Allow to cool for 10 minutes.

Use an ice cream scoop for easy removal from pan & enjoy!


February 10, 2013

DIY - Toy Storage Bench

My Daughter's Birthday Is In November & She Gets A Lot Of Toys...Just In Time For Christmas!  Needless To Say, It Was Time To Organize Them & What Better Way Than To Also Provide Some Seating?!


To Start, We Figured Out About Where We Wanted It & The Dimensions According To Where It Was Going To Go & How Spaced Out I Wanted Each Cube.  Since I Wanted Them Spaced Out Far, We Only Had Room For 3 Cubes, Which Was Perfect.
(The Beauty Of Being Married To A Number's Guy Is That This Bench Was Planned With Exact Measurements!!)

 
After It Was Nailed Together, We Filled In The Holes & Cracks


Then We Painted It.  I Went With White Since The Rest Of The Furniture In My Daughter's Room Is White.  I Used Behr Interior/Exterior Semi-Gloss Pure White From Home Depot.

 
Since We Were Going To Add Cushions On Top, We Thought It Would Be A Good Idea To Add A Strip Along The Three Sides Of The Top.

 
And My Handy Husband Made It Decorative By Setting It In About An Inch & Adding The Slant At Each End!  He's Brilliant!


Next, I Had To Organize Her Toys, Put Old Ones Away & Bring Out New Ones & It Was Complete!
The Only Item We Bought, Aside From The Wood & Paint, Was The Green Body Pillow Which I Found At IKEA For $12.99.

 
It's A Great Piece In Her Room Now & It's One That Reminds Me She Is Growing Up!
 

February 3, 2013

DIY - Photo Coasters

My Dear Friend Jen Just Got Married A Few Months Back & The First Time We Visited Her Home, My Daughter Ruined Her Cork Coasters! So, Of Course, I Wanted To Replace Them...This Time, Making Them Personal To Her.
 
 
Jen & Her New Husband, David, Had A Photo Booth At Her Wedding & I Was Able To Use The Pictures From That For These Coasters.  They Turned Out Amazing!
 
 
Here Are The Items I Needed.....
1. Photos Printed To Size On Card Stock
2. Coasters (Old Ones Or New Ones - I Grabbed These At A Garage Sale - FREE!!!)
3. Scrap Booking Paper Cutter
4. Scissors
5. Rotary Cutter
6. Cutting Mat
7. Mod Podge
8. Sponge Brush
9. Clear Acrylic Spray Paint (not in photo) 


First, I Trimmed Up The Photos Using My Scrap Booking Paper Cutter


Then I Applied A Coat Of Mod Podge On The Coasters & Laid The Photos On Top 


I Had To Lay Them Upside Down To Dry So They Would Stick Better


After They Dried, I Took My Rotary Cutter & Trimmed Up The Edges


 When They Were All Trimmed Up, I Took Them Outside To Lightly Sand The Edges Of Each Coaster. This Adds A Little Texture To Them


Next, I Applied 3 Coats Of Mod Podge, Letting Them Completely Dry Between Each Coat


After Each Coaster Was Completely Dry, I Took Them Back Outside & Sprayed A Coat Of Clear Acrylic Spray Paint On Them & Let Them Dry For At Least An Hour.  The Acrylic Seals In Everything & Allows Them To Be Usable As Coasters! Very Important!


When They Dried, I Packaged Them Up With A Little Bow.


This Is Such An Easy & Inexpensive Project & A Great Way To Give A Personalized Gift!
I'd Like To Say I Created This Myself, But When I Got Stuck With What To Put On Top Of The Mod Pogde Coats, I Saw ALL OVER Pinterest This Idea. Although, I Didn't Create It Initially, I Created These For My Friend! Try It Yourself!